During our hands-on Articulate 360 training, when we’re working with shapes or images in Storyline 360, we sometimes encounter the need to make those objects semi-transparent. Today, we’re answering the “as heard in training” question: “How Do I Create Transparency?”

Adjusting the level of transparency can be a great way to control the vibrancy of an object or add a level of subtlety to your courses.
In our example here, we’ve illustrated a few practical use cases for transparency:
- On the first slide, we’ve added transparency to the background image so the text and character in the foreground are easier to see.
Tip: The key here is a blank slide layout behind the image! - On the second slide, we use a semi-transparent shape both behind each section of content (so that the text is more legible), as well as to cover buttons not currently in use.
- On the final slide, we’ve used transparency in a Disabled state of a button to communicate that it’s currently disabled and not yet interactive.
However, practicality isn’t always the end goal…translucent objects can add a sleek quality to a course template or design.
To bring transparency into your own courses, read on!
Images
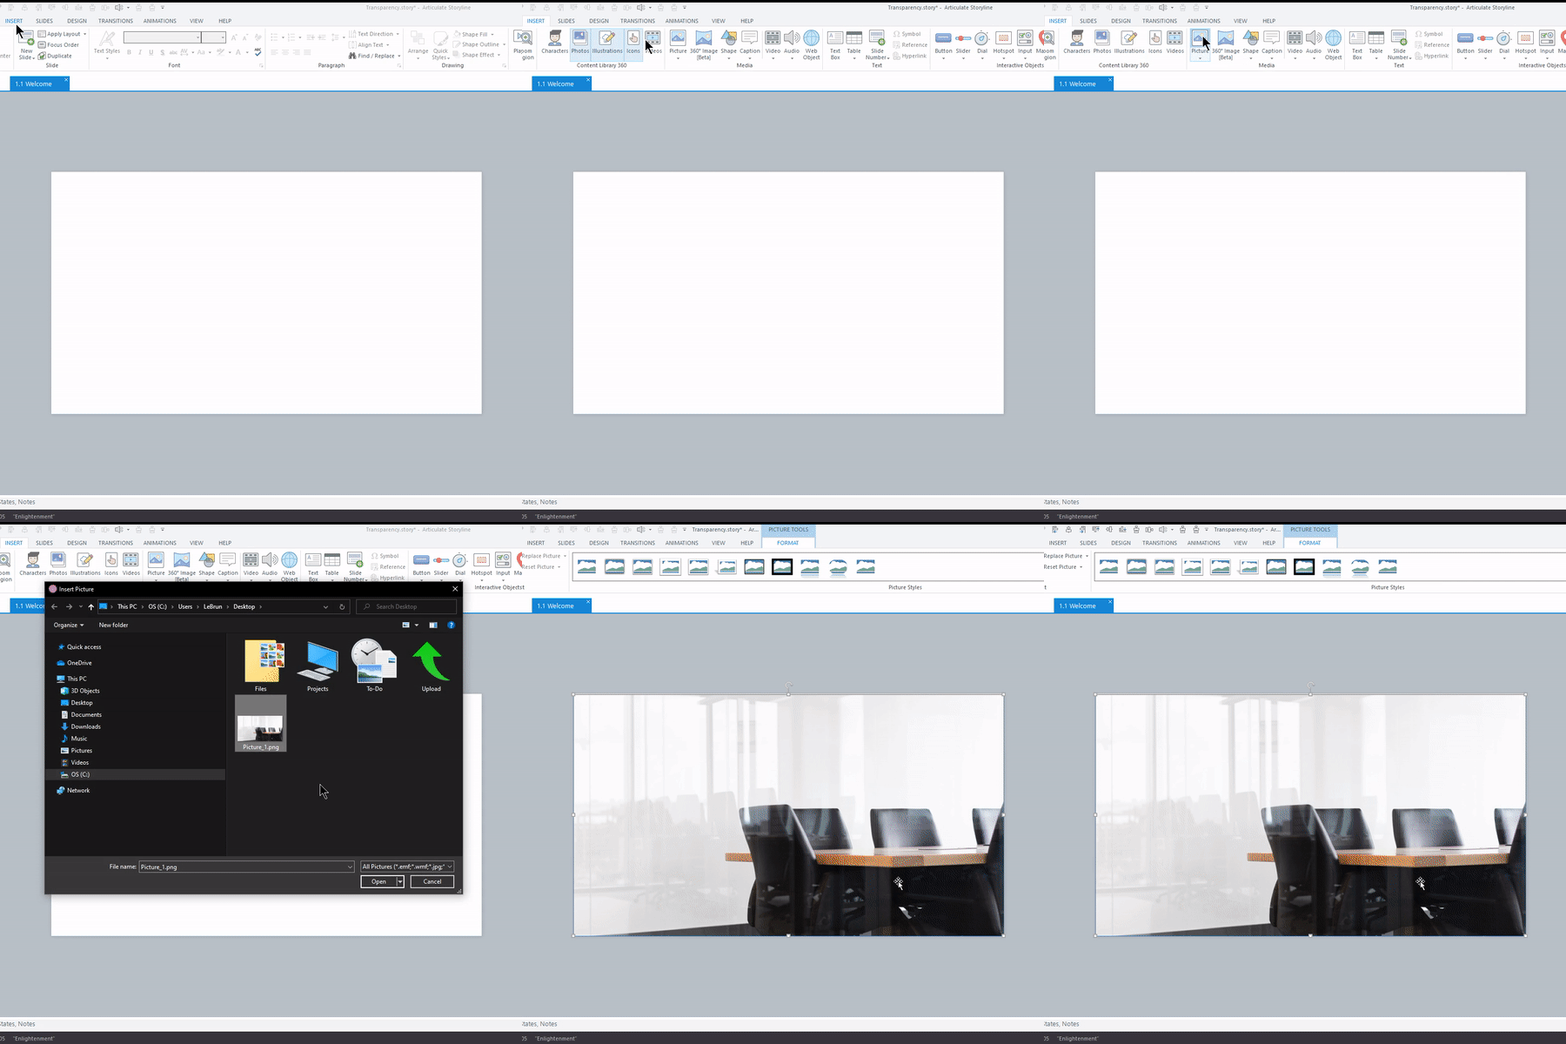
- Insert an image onto your slide from the Insert tab.

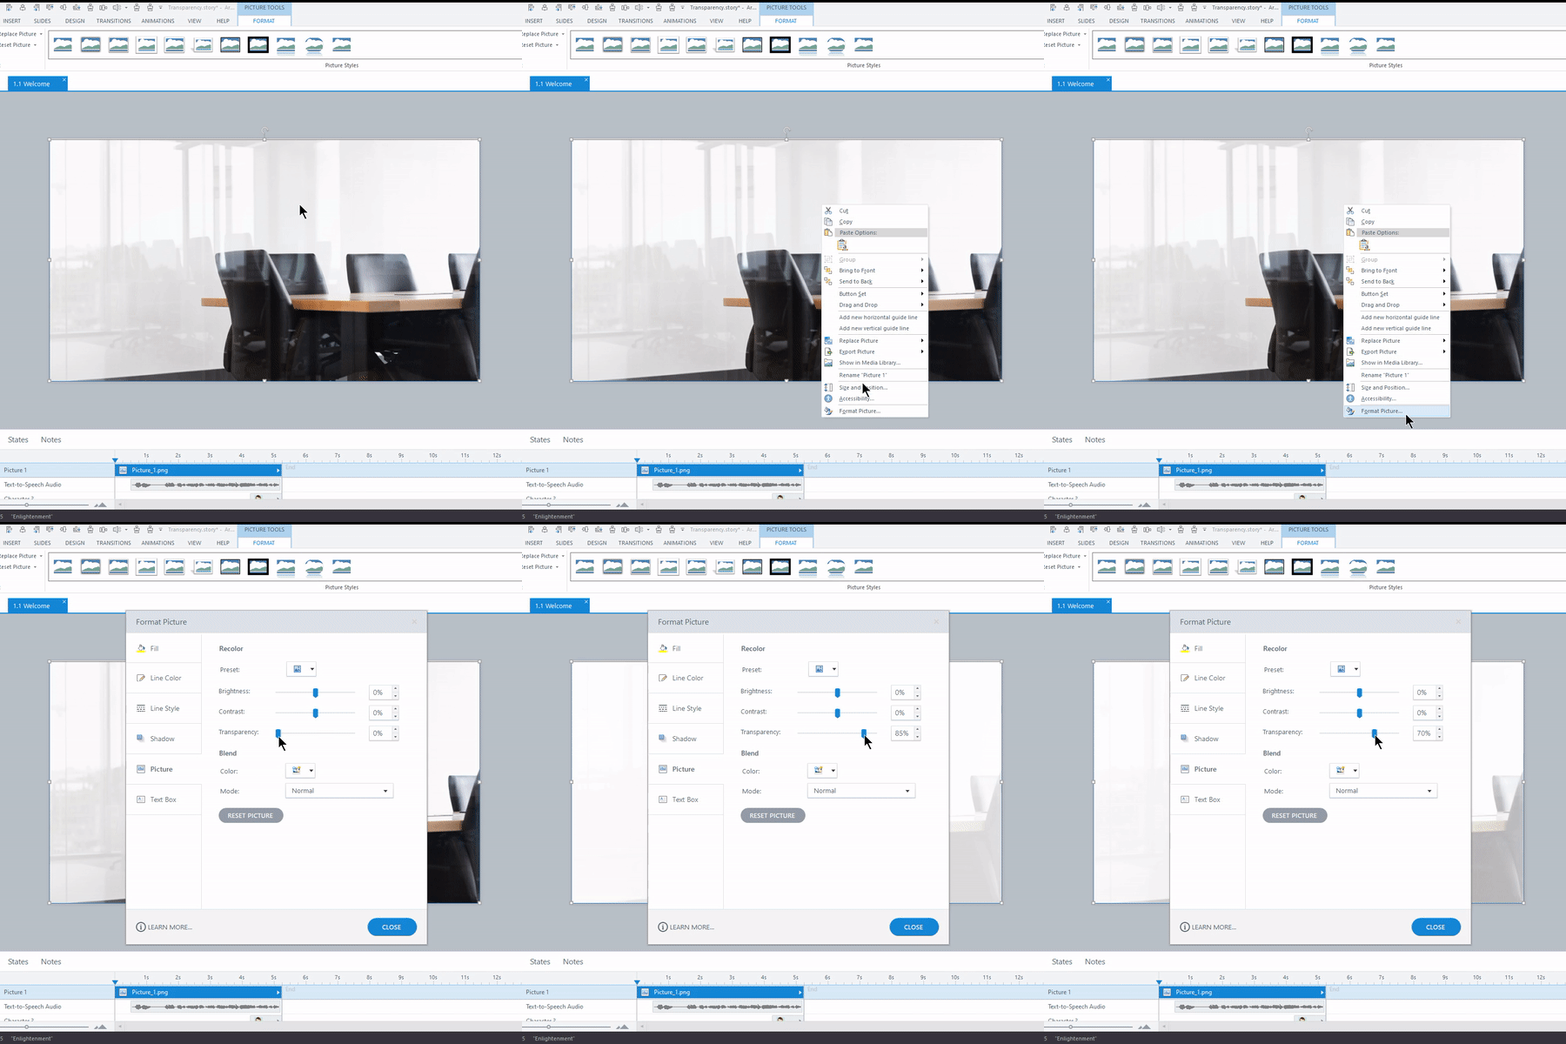
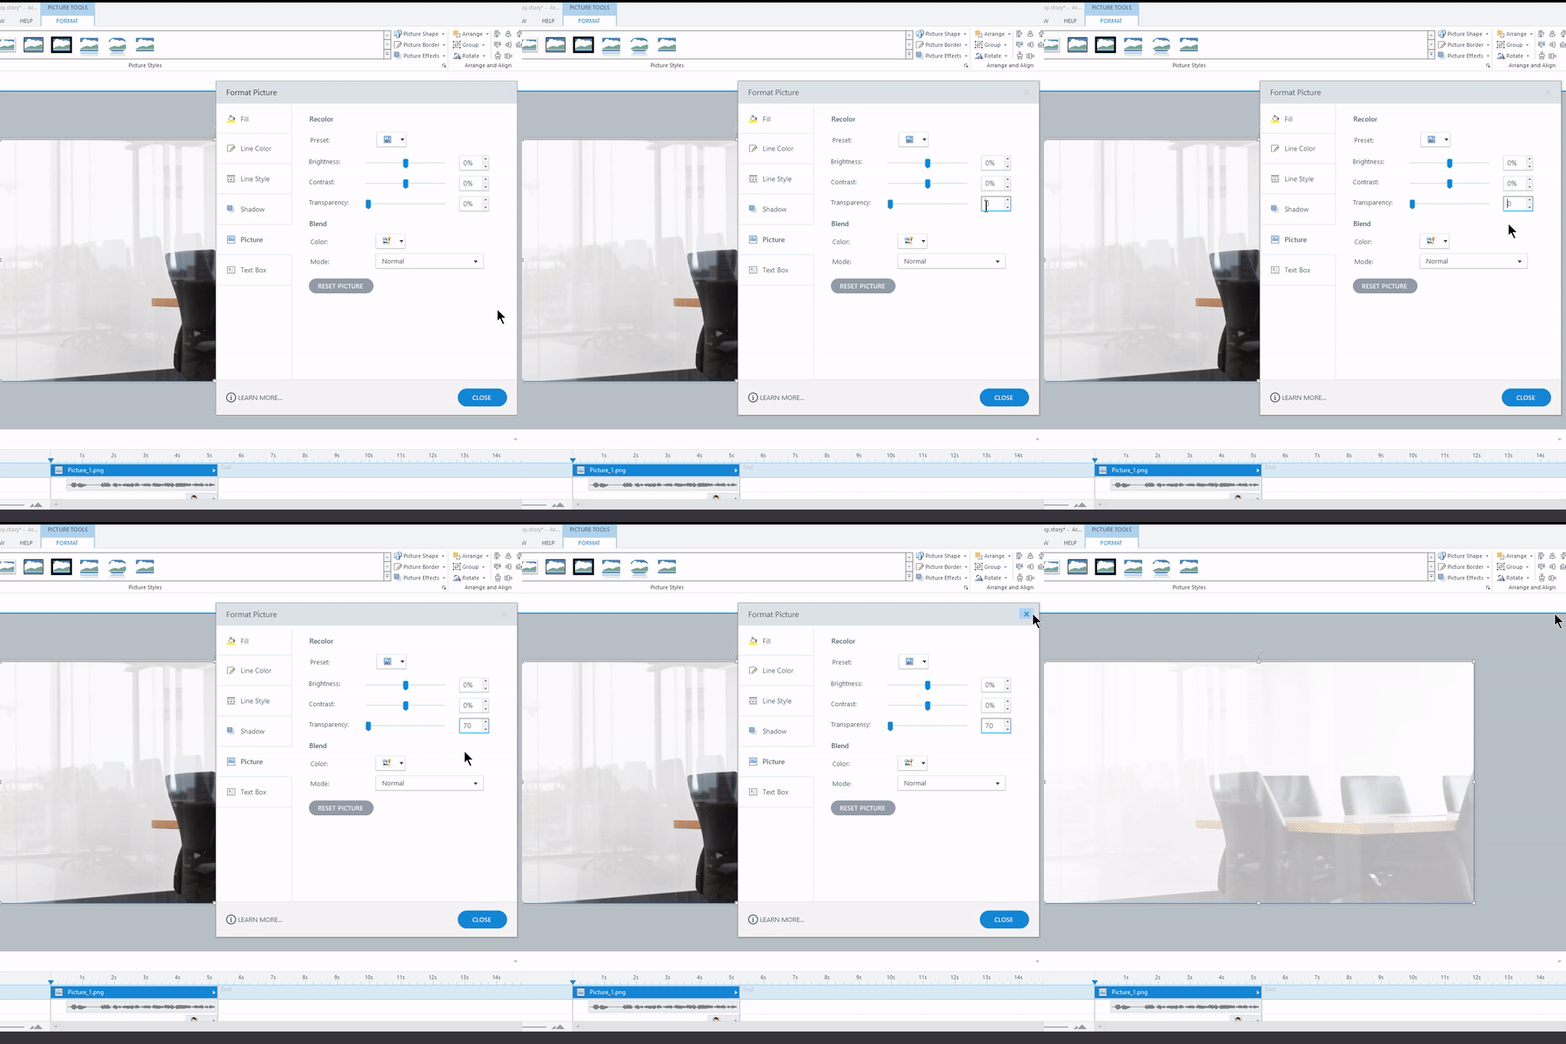
- In order to change the level of transparency, we need to access the “Format Picture” menu.
We can do that in a few ways:
a.) Right-click on the image and select Format Picture at the bottom of the drop-down menu. Then, look for the “Transparency” slider.

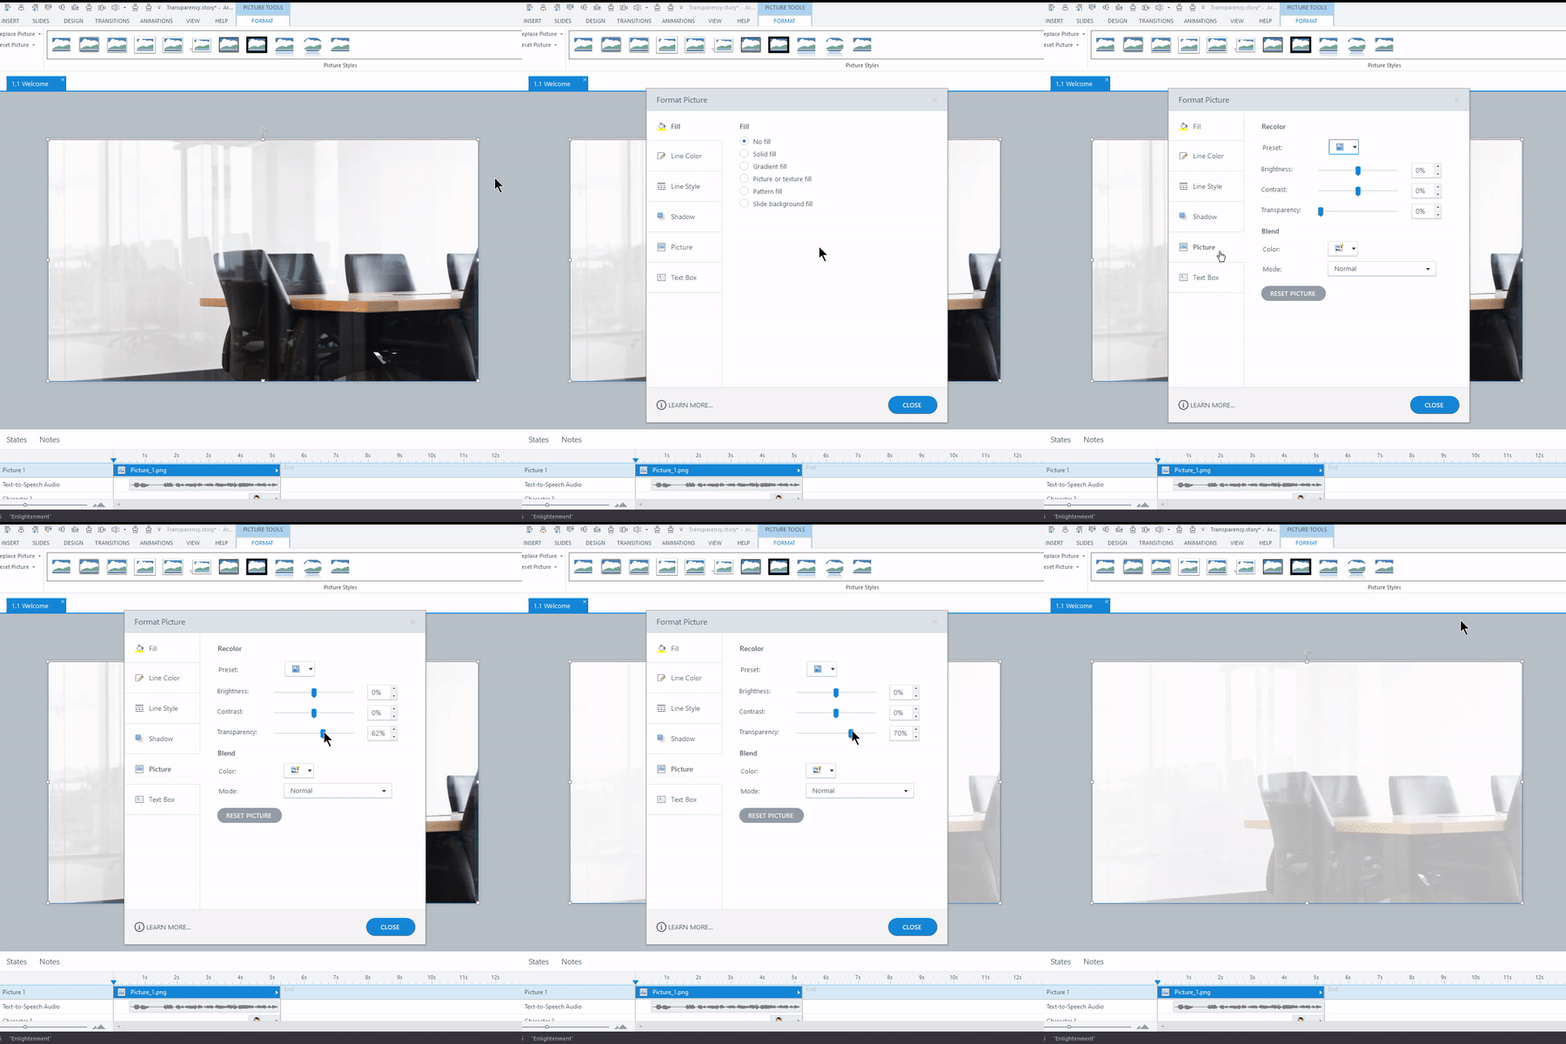
OR b.) We could also open this menu using the Ctrl and Enter keyboard shortcut. Then, select the Picture tab on the left to access the transparency slider.

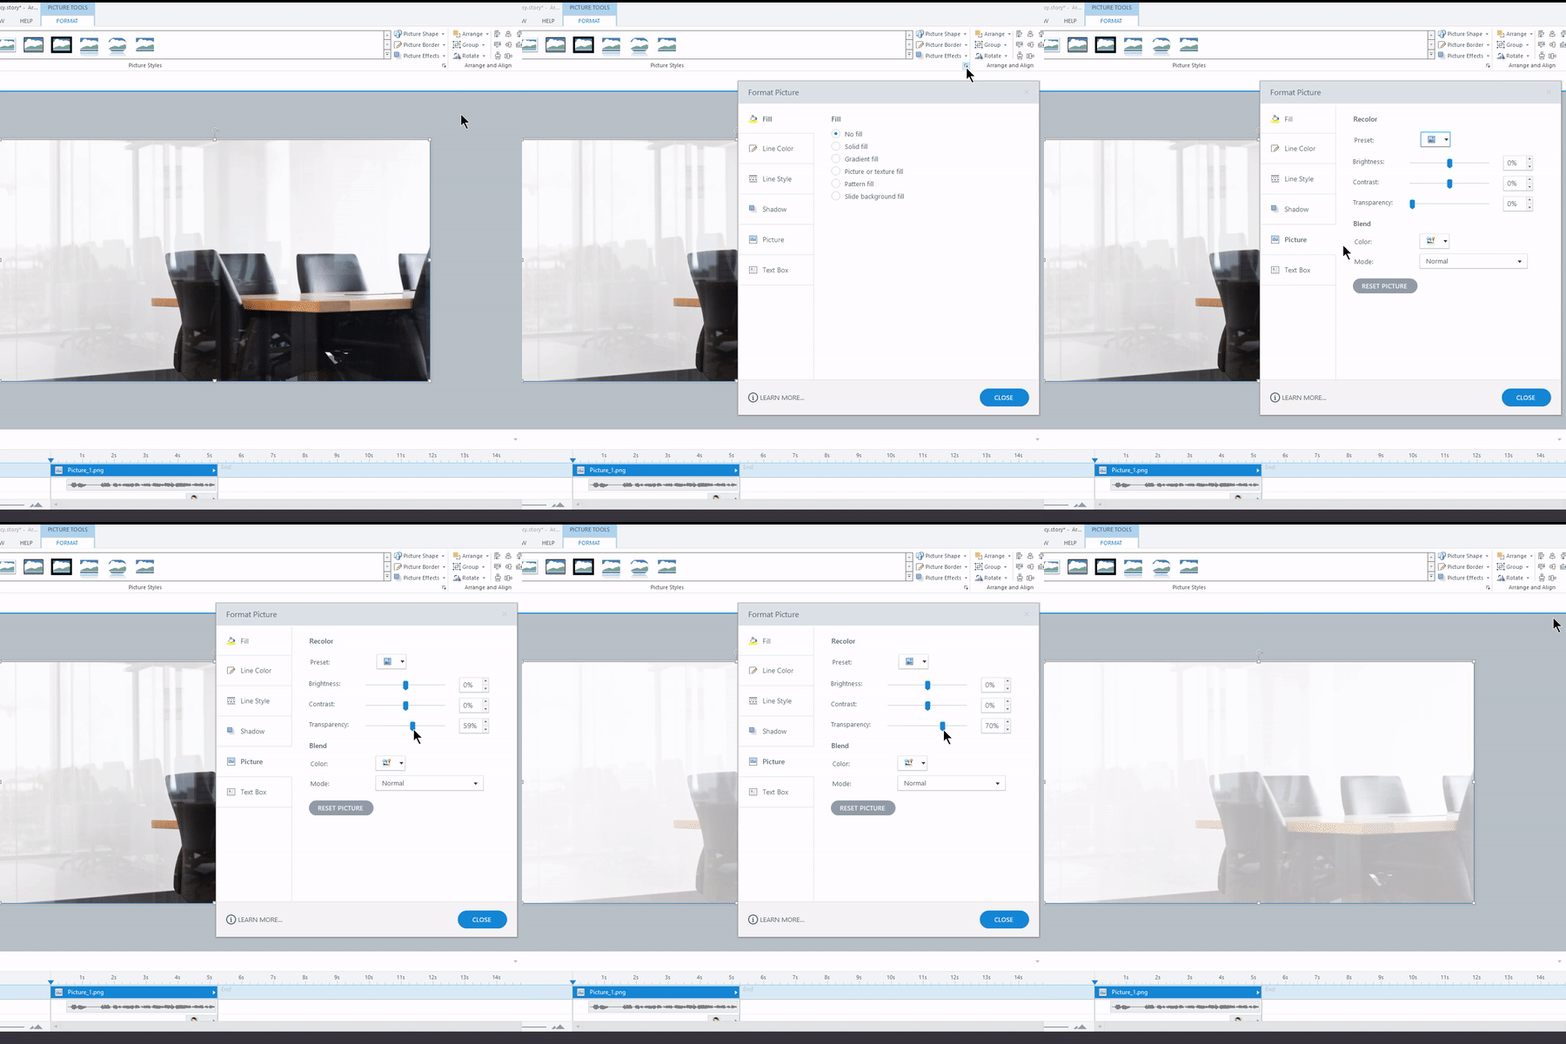
OR c.) With the image selected, select the arrow next to “Picture Styles” on the Format tab. Then, select the Picture tab on the left to access the transparency slider.

- With this Format Picture menu open, we can drag to move the transparency slider OR we can also type a number into the percentage field, instead of using the slider bar.

- Close the Format Picture window.
Shapes
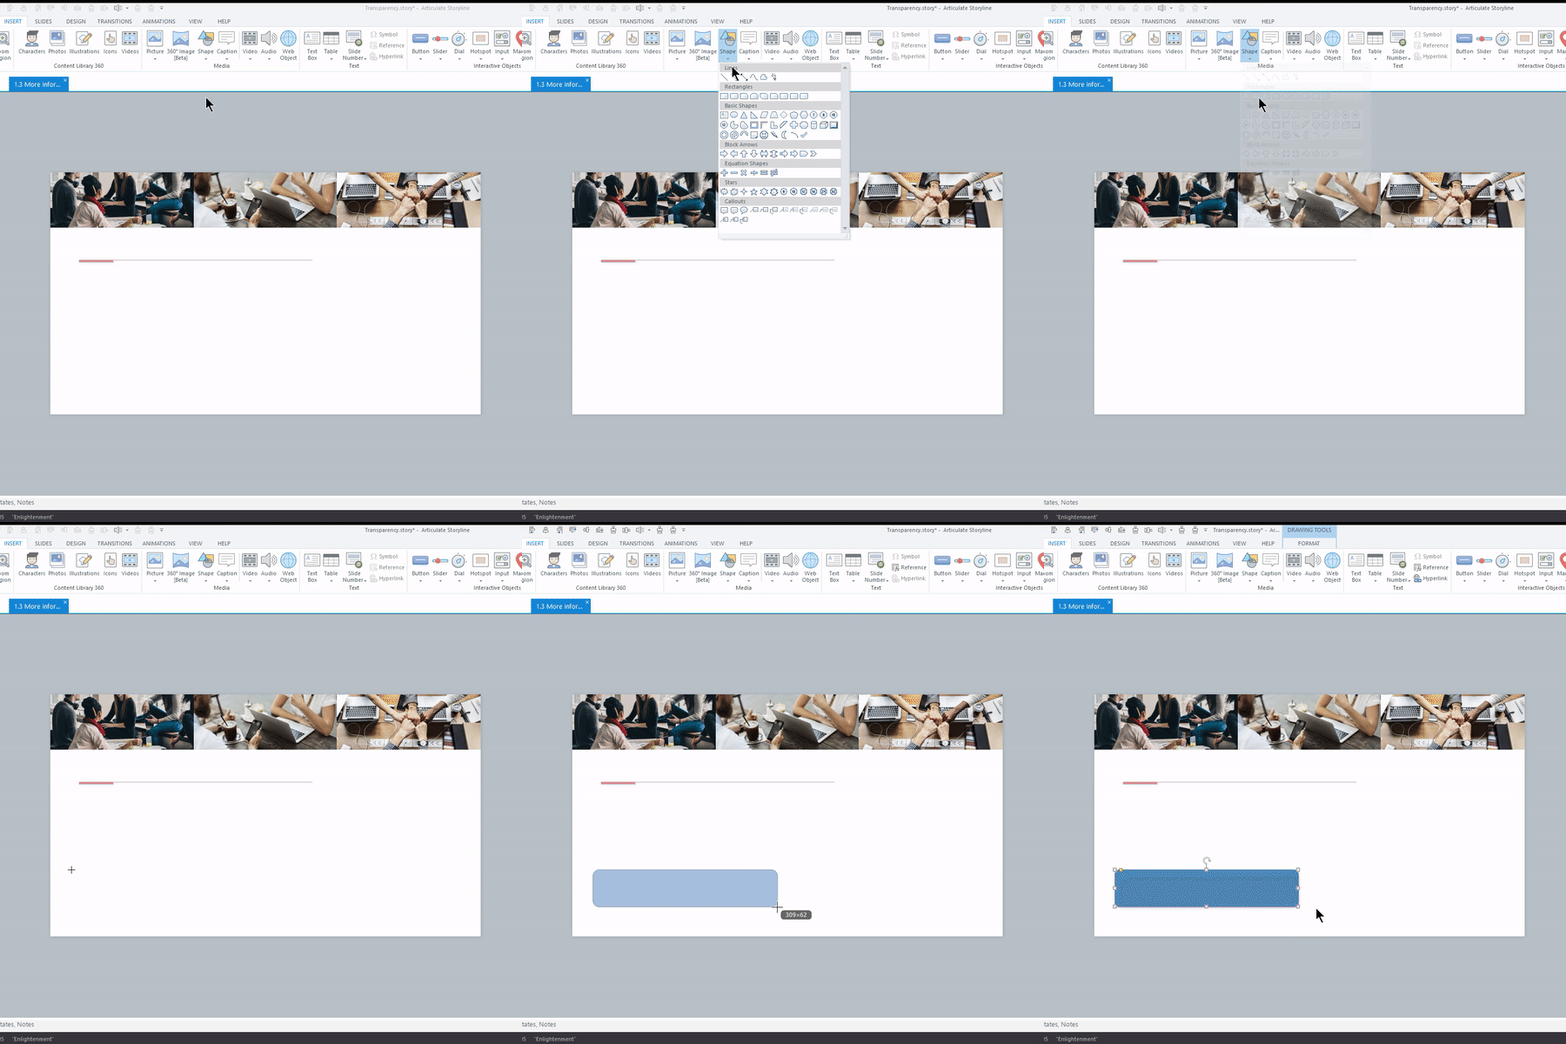
- Insert a shape onto your slide from the Insert tab.

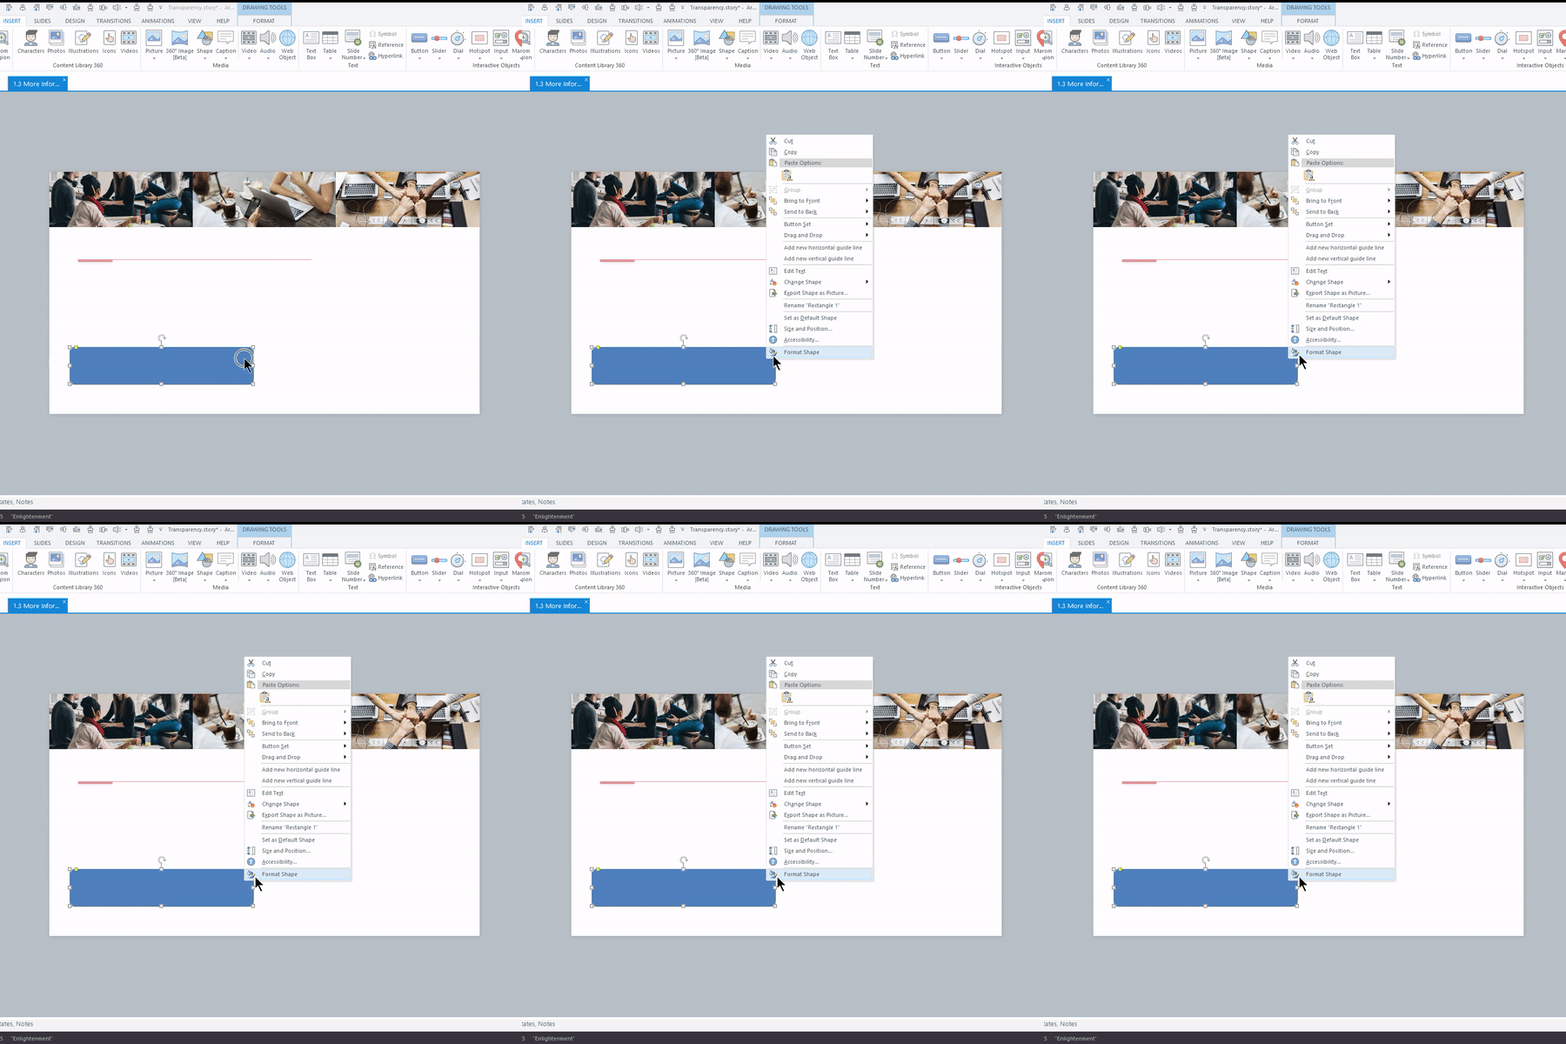
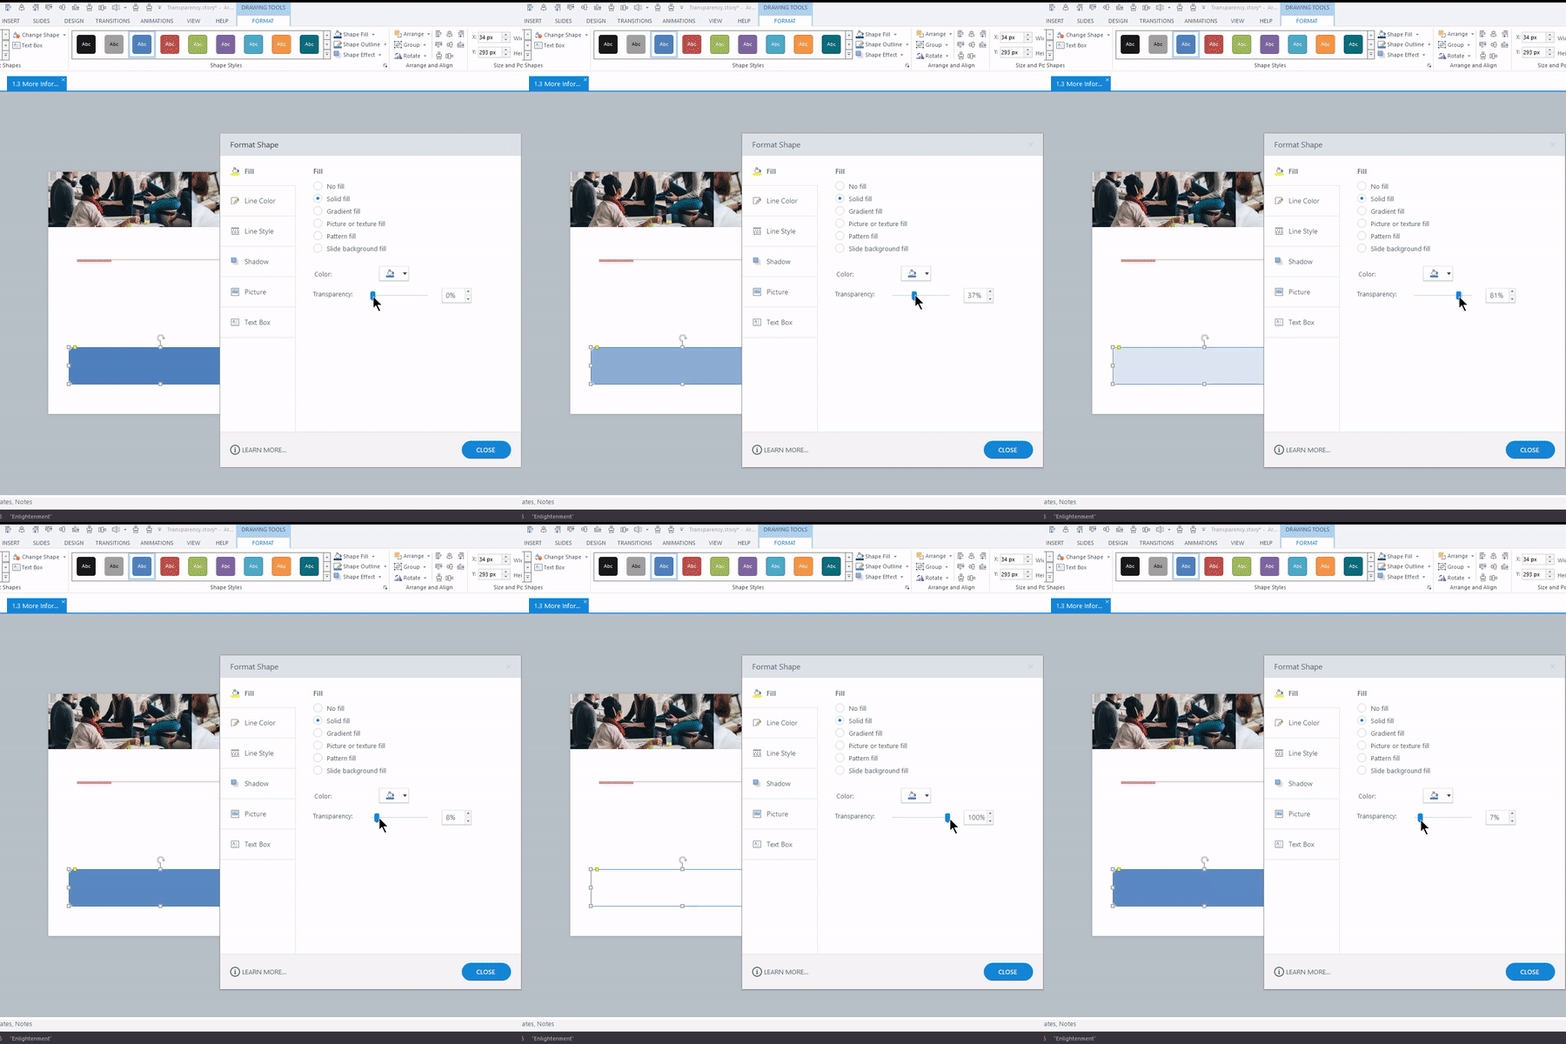
- Very similar to the image or picture method above, we need to access the “Format Shape” menu.
We can do that a few different ways:
a.) Right-click on the shape and select Format Shape at the bottom of the drop-down menu.

OR b.) We can also get to this menu using a keyboard shortcut. With the shape selected, hold the Ctrl and Enter keys on your keyboard and the same menu will open.
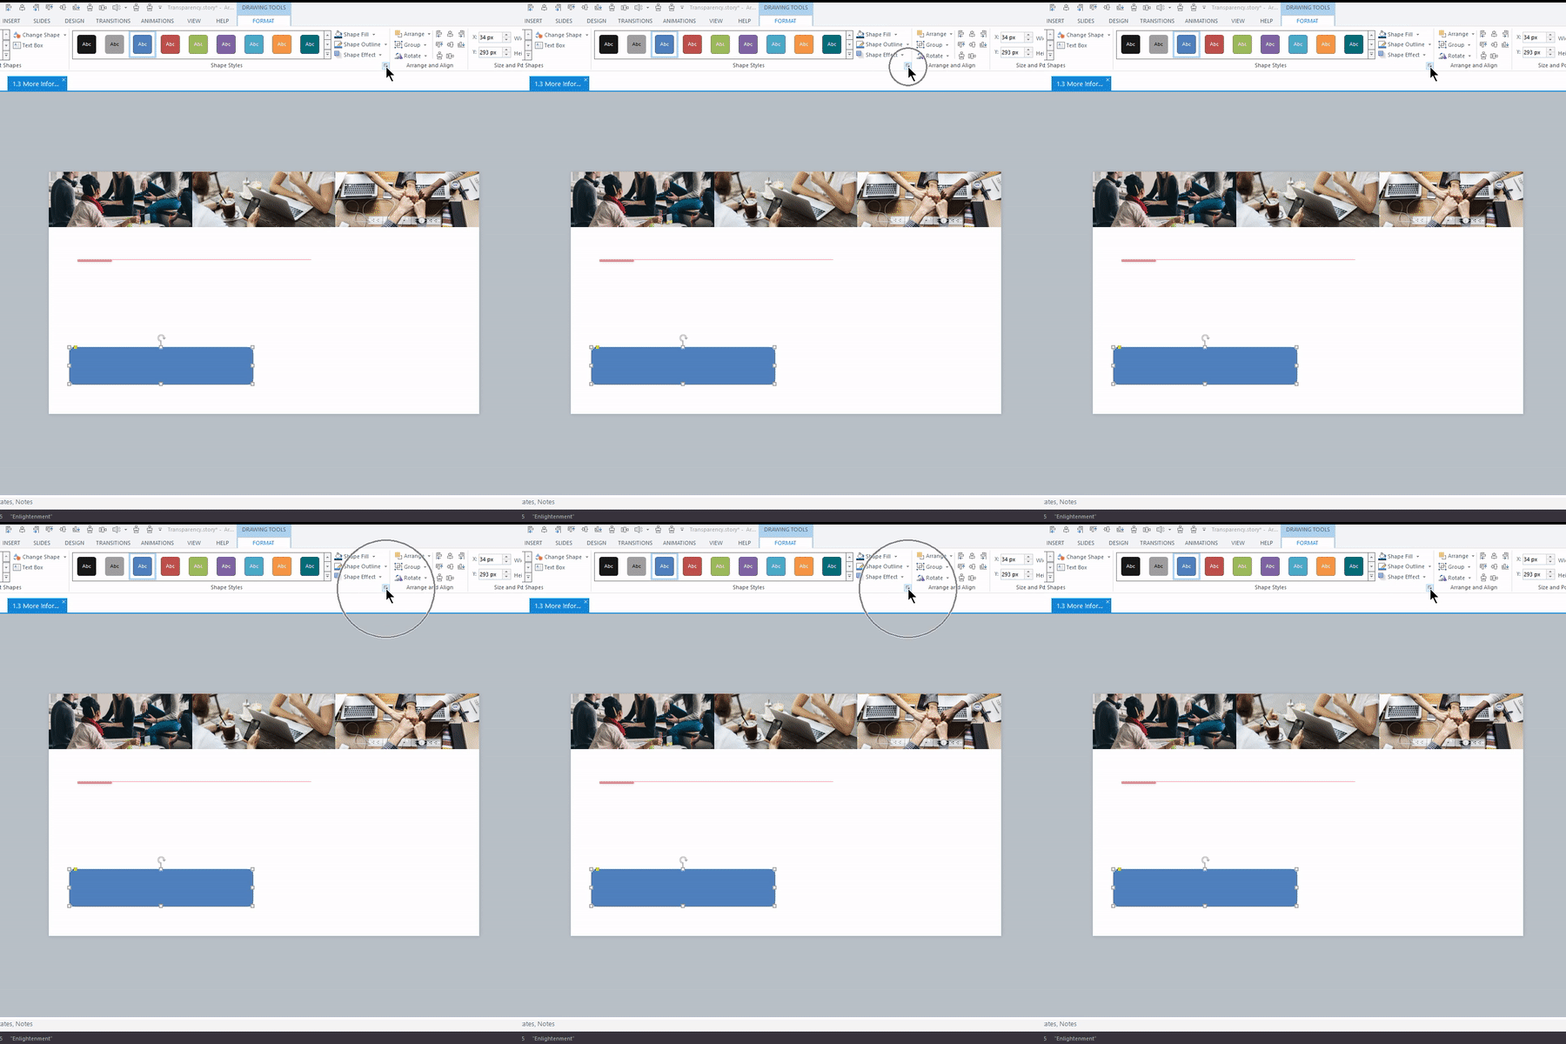
OR c.) With the object selected, select the arrow next to “Shape Styles” on the Format tab.

- With the Format Shape menu open, move the slider or type in a percentage to adjust the level of transparency.

- Close the Format Shape window.
A Note on Accessibility
When applying the element of transparency, it’s important to remember that graphics and text need to be visibly distinguishable in order to meet accessibility guidelines. It’s recommended to verify the contrast between the content and the background to confirm that they meet those standards.
For more on accessibility in Articulate 360, resources, and downloads, visit our webinar archive and learn more on “Developing Accessible Courses in Articulate Storyline 360.”
Semi-transparent objects are not only trending in the e-Learning industry, but have been trending in the design world as a whole. At Yukon Learning, we’ve found that the element of transparency can significantly enhance—or even take the lead—in our custom e-Learning.
What do you think…will you use transparency in your courses? Feel free to download our course example to explore and tinker “under the hood,” and if you have questions or thoughts, contact us here OR let us know in the comments below.
Enjoy!

~ John B.
Leave a Reply