When we cover Player design and publishing during our hands-on Articulate training, a very common “as heard in training” question arises from nearly every training: “How can I restrict the navigation of my course so the user can’t skip ahead?”
Along with selecting the option to restrict navigation, there are a few related factors we need to consider. Let’s also look at some tips you may find helpful when using restricted navigation.
Restricting Navigation
Why would we want to restrict navigation? After all, hasn’t our course been developed so brilliantly that people will be excited to take it? While that is most likely the case, restricted navigation allows us to ensure that users see all content. Additionally, users may be required to spend a certain amount of time in the course. This is usually the case with certification or compliance-based courses. Restricted navigation allows us to meet these mandated requirements.
The first step in creating restricted navigation is to adjust the Player Properties and set the Menu to “Restricted.” This can be done by selecting Home tab | Player | Menu | gear icon.
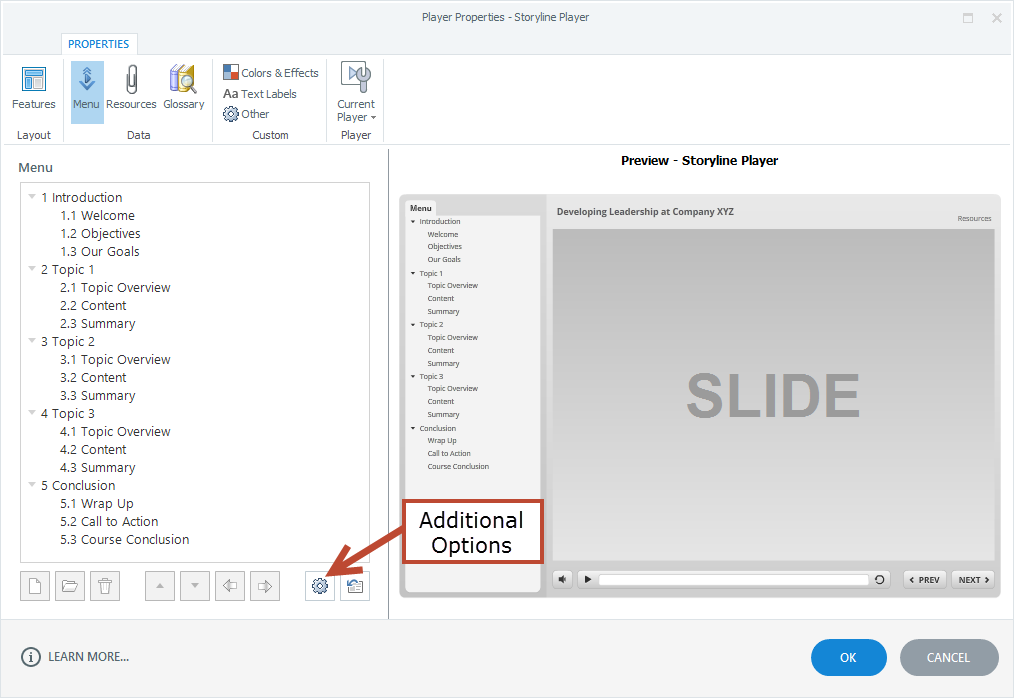
Within the Menu Options, you will see the opportunity to choose between Free, Restricted, and Locked navigation options.
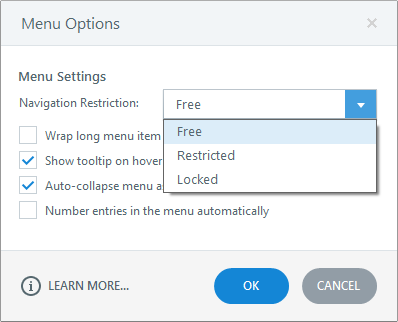
The meanings of these options are defined by Articulate as:
- Free: This option lets learners navigate to any part of the course at any time. They can view slides in any order.
- Restricted: This means learners can view the current slide and any slide they previously viewed, but they can’t jump ahead or skip over slides.
- Locked: This means learners can only view slides in the order you’ve designed. They can’t jump ahead or skip over slides, nor can they go back to any previously-viewed slides.
Tip: Most students and customers we work with prefer the Restricted option, since it allows for review of previously-accessed material.
Seekbar Considerations
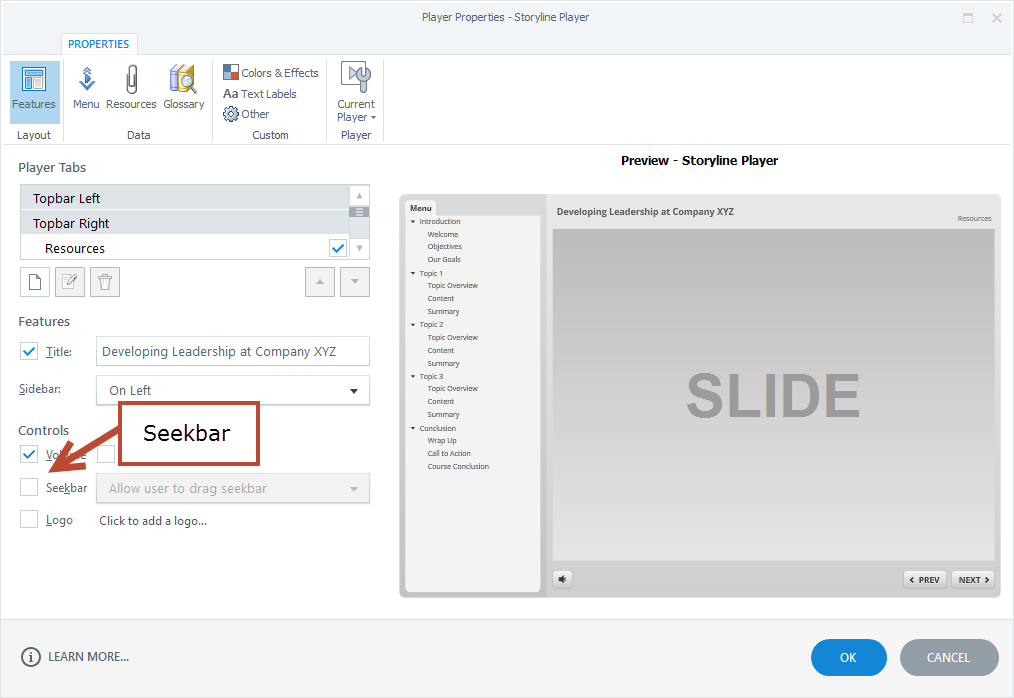
Once the Menu has been restricted, one must then consider the route they would like to take regarding the seekbar at the bottom of the course. Choose which level of restriction you need for your seekbar by selecting Player | Features | Seekbar.
Slide Considerations
When using interactive slides with layers, restricted navigation can have a significant effect on the behavior of those slides. In Storyline, choosing the Restricted option for the menu, by default, also restricts the functionality of the Next button. Specifically, the user will not be able to select Next until the timeline of the slide has ended. Because of this, you must always ensure that the base layer’s timeline reaches the end. This can be done in several ways:
1. Adjust the Layer Properties to return to the base layer when the timeline of the layer ends.
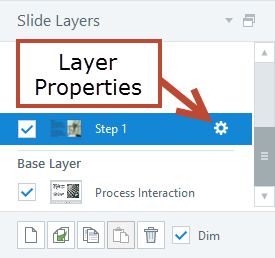
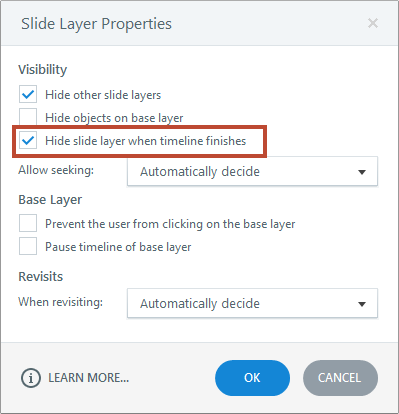
This ensures that the user can always return to the base layer and allow the timeline to complete. But what if we don’t need or want to return to the base layer?
2. Animate interactive objects (such as buttons) to appear near the end of the base layer’s timeline.
If the buttons enter at the very end of the timeline, there is a reduced chance that your learner will click on them before the base layer’s timeline has ended.
3. Create a “cover” to make the buttons inaccessible until the end of the base layer’s timeline.
This is my favorite method to use, as I often want my buttons to animate onscreen as they are mentioned in the audio. To create a cover, simply draw a shape over the buttons, remove its outline, and format it to be 100% transparent. Make sure that your cover is at the top of the timeline, on top of your buttons. Then, set the end time of the “cover” to .25 seconds before the end of the timeline of the base layer.
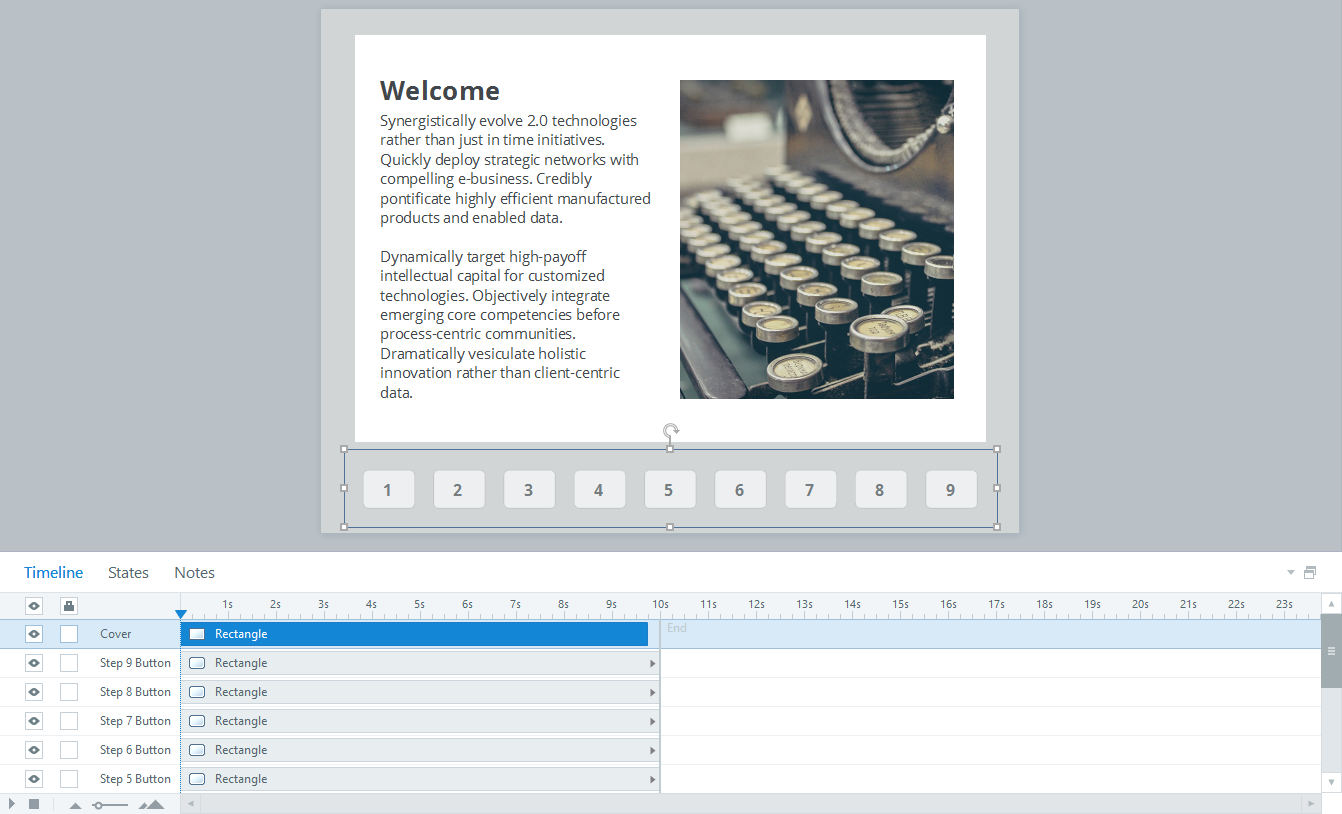
Tip: Another method is to use a hotspot as your button cover. Just be sure to disable the hand cursor by right-clicking the hotspot and unchecking Show Hand Cursor on Hover.
The great thing about this method is it also ensures that the user sees all the information on the base layer before moving on to the interaction.
Review Cycle Considerations
Throughout the course’s review cycles, using a restricted menu can complicate things, especially in early drafts. You might consider keeping the navigation set to Free to allow for easier navigation and fast-forward/rewind capabilities. However, in later review cycles, it’s important to set the menu back to Restricted to test for functionality. You want to get as close to the end-user’s experience as you can! (And don’t forget to test every “what if” you can think of!)
Summary
These are just a few options you can keep in mind when developing courses with restricted navigation. There are many more, because as we all know, “There’s never any one way to do something in Storyline.”
What do you consider when restricting e-Learning? Leave your comments at the end of this blog to share your thoughts, and happy developing!
“We’re all stories in the end. Just make it a good one, eh?” ~The Doctor

~Raye
Hi there! How can we assure that the second time the viewers see the course without restrictions?
Kind regards,
Tonia
Hello Tonia,
Thank you for your question. Regarding the viewers NOT having restrictions on the second time through a course, you will want to set the course as restricted, which has that functionality built in. Now if you are talking about a situation where the learner completely leaves the course and then logs back in, you will want to make sure that the options for “Prompt to Resume” (Player Design) a course are set in the course and/or in your LMS. These options are slightly different in Storyline 2 than they are in 360 or Storyline 3. For example, in SL2, you have the option to choose “When running in LMS, ignore Flash cookie.” You will want that checked in SL2 if you use an LMS. I hope that helps. Please reach out for more information, if needed.